 |
| Larger Image: http://tinyurl.com/3akkhzr |
Sunday, 5 December 2010
More progress
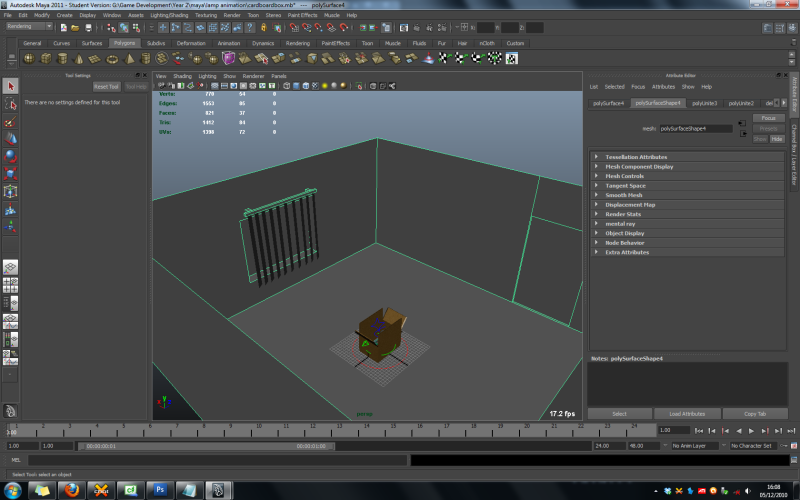
In between learning how to rig models with the help of the official Maya rigging tutorial, I've been slowly building up the environment for my lamp animation. Heres how it looks so far:
You should be able to make out the untextured window with a set of blinds covering it and a placeholder rectangle for where the door and door frame will be. Theres a lot more to be added yet though, such as a TV, more packed up things in boxes, a table, sofa and more.
More progress
In between learning how to rig models with the help of the official Maya rigging tutorial, I've been slowly building up the environment for my lamp animation. Heres how it looks so far:
You should be able to make out the untextured window with a set of blinds covering it and a placeholder rectangle for where the door and door frame will be. Theres a lot more to be added yet though, such as a TV, more packed up things in boxes, a table, sofa and more.
|
| Larger Image: http://tinyurl.com/3akkhzr |
Sunday, 21 November 2010
Moving house with a lamp
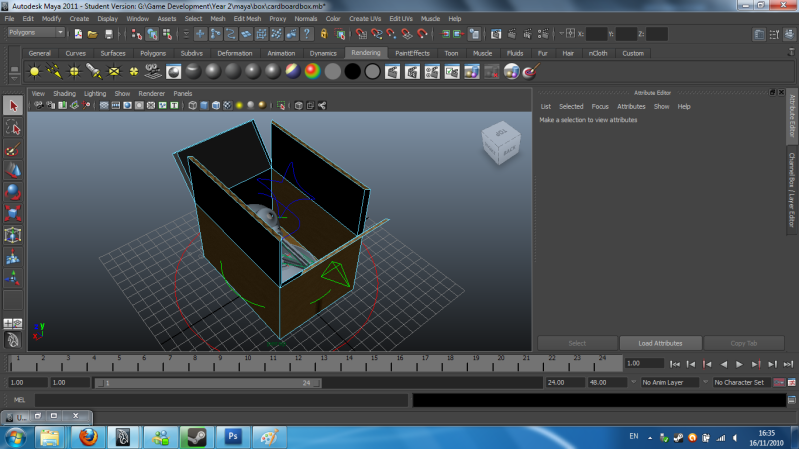
Ok, so I'm not really moving house and bringing a lamp with me, but thats the basic story or scene for my lamp animation, which I've finally made a start on. The first and most important item I need to make, aside from the lamp itself is the cardboard box which the lamp starts off in. The scene itself will start off in the living room of a house, where everything has just arrived from the owners old house in boxes. The lamp will break out of one of the boxes and explore the room, maybe unpacking a few other items to interact with too.
Heres a few screenshots of the box with the lamp inside, so far:
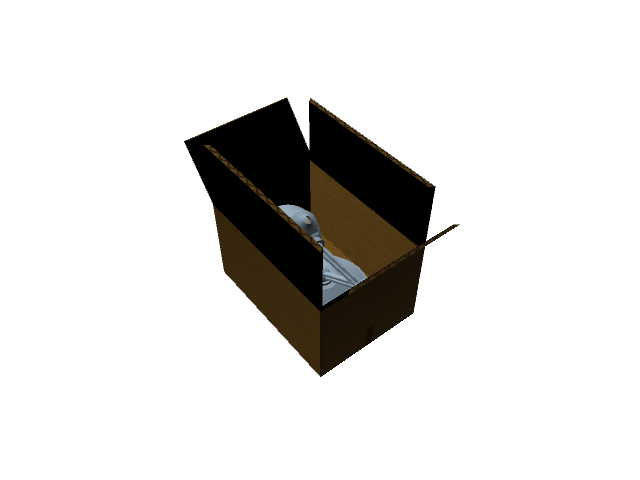 The box texture isn't finished yet and I might have to rig the box when i figure out how, so that the flaps can move around as the lamp is interacting with the box.
Heres a few screenshots of the box with the lamp inside, so far:
 |
| Larger Screenshot: http://tinyurl.com/22tj5s8 |
Moving house with a lamp
Ok, so I'm not really moving house and bringing a lamp with me, but thats the basic story or scene for my lamp animation, which I've finally made a start on. The first and most important item I need to make, aside from the lamp itself is the cardboard box which the lamp starts off in. The scene itself will start off in the living room of a house, where everything has just arrived from the owners old house in boxes. The lamp will break out of one of the boxes and explore the room, maybe unpacking a few other items to interact with too.
Heres a few screenshots of the box with the lamp inside, so far:
The box texture isn't finished yet and I might have to rig the box when i figure out how, so that the flaps can move around as the lamp is interacting with the box.
Heres a few screenshots of the box with the lamp inside, so far:
|
| Larger Screenshot: http://tinyurl.com/22tj5s8 |
Tuesday, 16 November 2010
Finished Walk Cycle
In between working on other things, I've added arm and hand movement to the walking animation I was previously working on. Heres the result so far:
Finished Walk Cycle
In between working on other things, I've added arm and hand movement to the walking animation I was previously working on. Heres the result so far:
Friday, 5 November 2010
Basic Walking Cycle
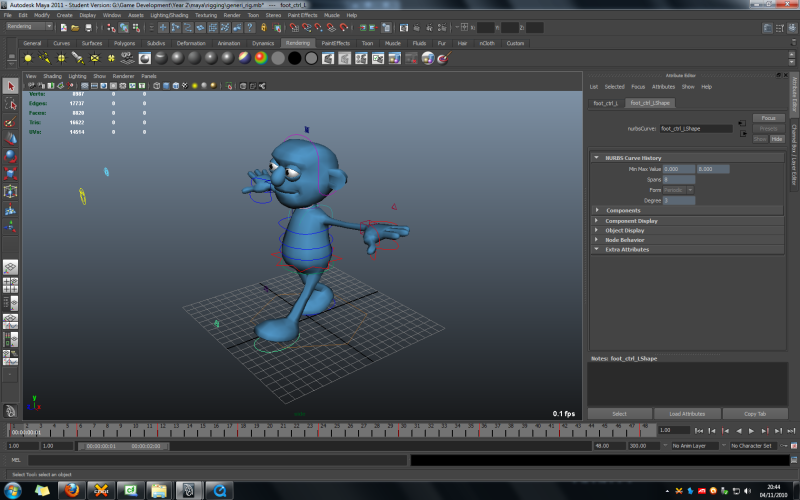
After tuesdays 3D animation lecture this week I went off and had another try at a basic walk cycle for the Generic Rigged character we were all given. This is the result:
Here is a screenshot of the character in Maya before the video was rendered:
Before starting my second attempt at the walk cylce I had a look around on the internet to see if there was anything that could demonstrate how a basic walk cycle works and found this, which may help anyone else stuck with their walking animation: https://cyberdog.wikispaces.com/WALKCYCLE
A diagram on there breaks the cycle down into five stages. Contact, Down, Pass, Up and Contact (again, but with the other foot), which must be done for both feet in order for the animation to loop seamlessly. It certainly made it easier for me, since I work better when things are broken down into stages.
Here is a screenshot of the character in Maya before the video was rendered:
 |
Larger Image at: http://tinyurl.com/33qd9eh |
Before starting my second attempt at the walk cylce I had a look around on the internet to see if there was anything that could demonstrate how a basic walk cycle works and found this, which may help anyone else stuck with their walking animation: https://cyberdog.wikispaces.com/WALKCYCLE
A diagram on there breaks the cycle down into five stages. Contact, Down, Pass, Up and Contact (again, but with the other foot), which must be done for both feet in order for the animation to loop seamlessly. It certainly made it easier for me, since I work better when things are broken down into stages.
Basic Walking Cycle
After tuesdays 3D animation lecture this week I went off and had another try at a basic walk cycle for the Generic Rigged character we were all given. This is the result:
Here is a screenshot of the character in Maya before the video was rendered:
Before starting my second attempt at the walk cylce I had a look around on the internet to see if there was anything that could demonstrate how a basic walk cycle works and found this, which may help anyone else stuck with their walking animation: https://cyberdog.wikispaces.com/WALKCYCLE
A diagram on there breaks the cycle down into five stages. Contact, Down, Pass, Up and Contact (again, but with the other foot), which must be done for both feet in order for the animation to loop seamlessly. It certainly made it easier for me, since I work better when things are broken down into stages.
Here is a screenshot of the character in Maya before the video was rendered:
|
Larger Image at: http://tinyurl.com/33qd9eh |
Before starting my second attempt at the walk cylce I had a look around on the internet to see if there was anything that could demonstrate how a basic walk cycle works and found this, which may help anyone else stuck with their walking animation: https://cyberdog.wikispaces.com/WALKCYCLE
A diagram on there breaks the cycle down into five stages. Contact, Down, Pass, Up and Contact (again, but with the other foot), which must be done for both feet in order for the animation to loop seamlessly. It certainly made it easier for me, since I work better when things are broken down into stages.
Friday, 29 October 2010
Wooden Chest Model
In between doing other work I've started working on a new wooden chest model. When its finished it'll have an open and close animation, and a wooden texture similar to that of my wooden barrel model. I'm hoping to build a collection of models in my spare time, themed on medieval or imperial age.
Heres a few pictures of the wooden chest so far:
Heres a few pictures of the wooden chest so far:
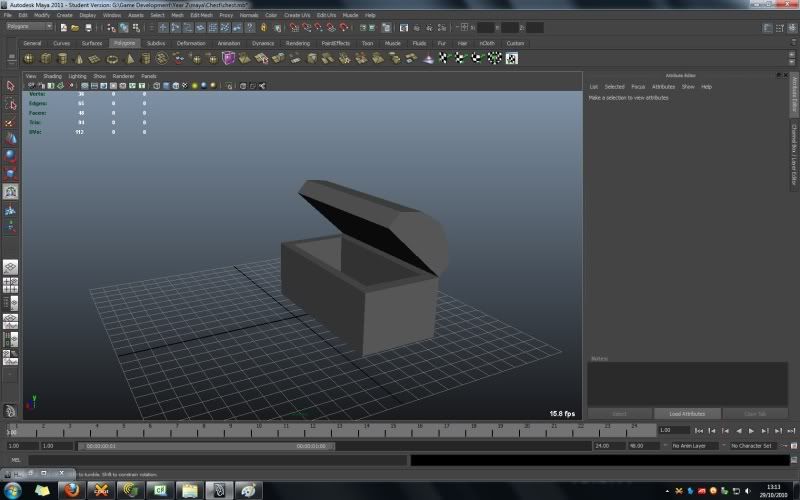 | ||
| Larger Screenshot: http://tinyurl.com/37kfusu |
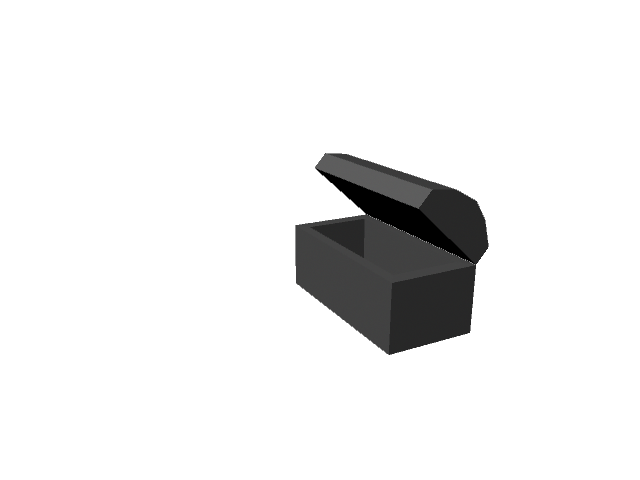 |
| A render of the unfinished chest |
Wooden Chest Model
In between doing other work I've started working on a new wooden chest model. When its finished it'll have an open and close animation, and a wooden texture similar to that of my wooden barrel model. I'm hoping to build a collection of models in my spare time, themed on medieval or imperial age.
Heres a few pictures of the wooden chest so far:
Heres a few pictures of the wooden chest so far:
| ||
| Larger Screenshot: http://tinyurl.com/37kfusu |
|
| A render of the unfinished chest |
Tuesday, 19 October 2010
Hands and Faces
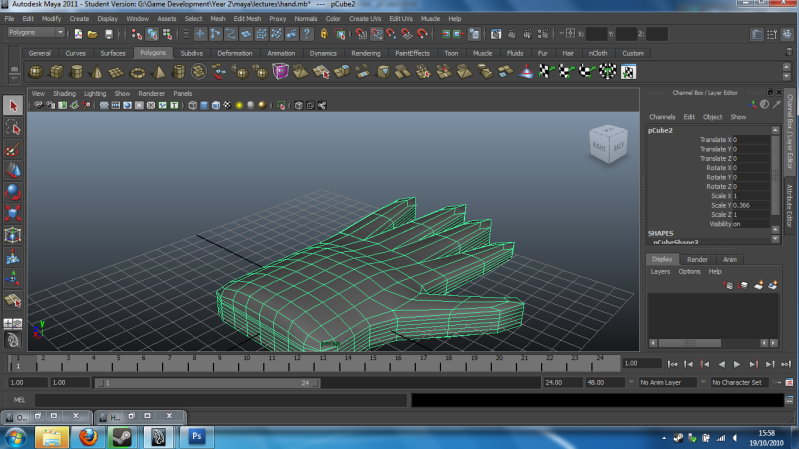
Today's Maya lecture was rather interesting. I picked up a few new techniques for starting off hands and faces which seemed a lot quicker to do than modelling each finger or face feature seperately like I tried to do (like a fool). For a basic hand, you start off with a sub-divided cube and extrude certain faces to produce the fingers and thumb. For a face, you start off with a sub-divided cube but instead, you delete half of it and then split polygons that you want to use for facial features (e.g. nose, eyes or mouth).
Heres a screenshot of a smoothed hand model I had a go at in the lecture:
Heres a render of a face I attempted with its smoothed, symmetrical version next to it:
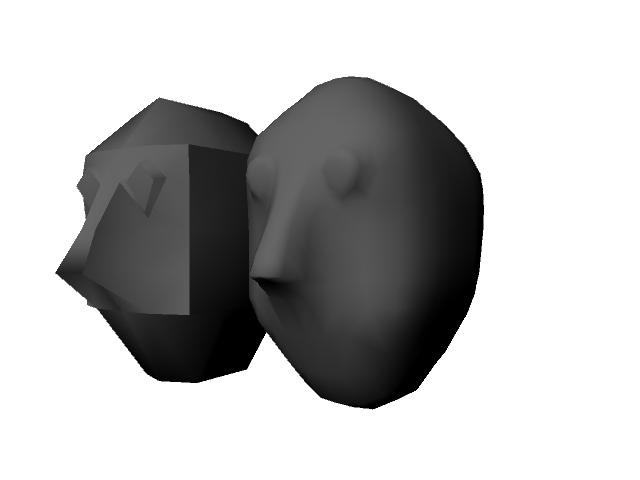
I'll be playing around more with these tools later, especially with making faces since that is my weakest point in modelling and drawing. Before starting with Maya in september, I had only made a few levels/maps, buildings and objects with 3D Studio Max and Blender which I used in a few of my mods for various games.
Heres a screenshot of a smoothed hand model I had a go at in the lecture:
 | |
| Larger Image: http://tinyurl.com/3aegbu5 |
I'll be playing around more with these tools later, especially with making faces since that is my weakest point in modelling and drawing. Before starting with Maya in september, I had only made a few levels/maps, buildings and objects with 3D Studio Max and Blender which I used in a few of my mods for various games.
Hands and Faces
Today's Maya lecture was rather interesting. I picked up a few new techniques for starting off hands and faces which seemed a lot quicker to do than modelling each finger or face feature seperately like I tried to do (like a fool). For a basic hand, you start off with a sub-divided cube and extrude certain faces to produce the fingers and thumb. For a face, you start off with a sub-divided cube but instead, you delete half of it and then split polygons that you want to use for facial features (e.g. nose, eyes or mouth).
Heres a screenshot of a smoothed hand model I had a go at in the lecture:
Heres a render of a face I attempted with its smoothed, symmetrical version next to it:
I'll be playing around more with these tools later, especially with making faces since that is my weakest point in modelling and drawing. Before starting with Maya in september, I had only made a few levels/maps, buildings and objects with 3D Studio Max and Blender which I used in a few of my mods for various games.
Heres a screenshot of a smoothed hand model I had a go at in the lecture:
| |
| Larger Image: http://tinyurl.com/3aegbu5 |
I'll be playing around more with these tools later, especially with making faces since that is my weakest point in modelling and drawing. Before starting with Maya in september, I had only made a few levels/maps, buildings and objects with 3D Studio Max and Blender which I used in a few of my mods for various games.
Sunday, 17 October 2010
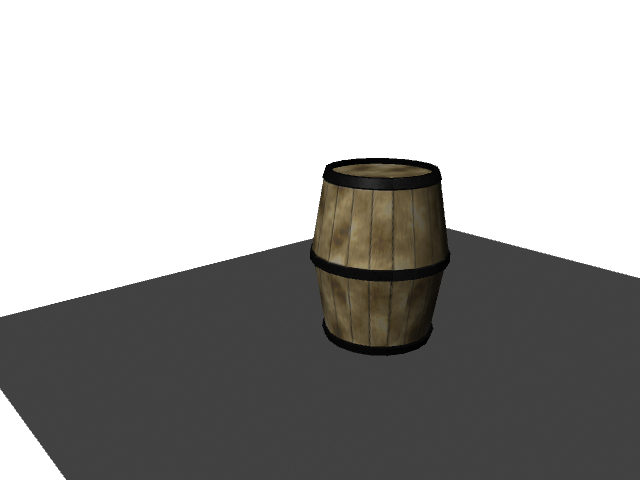
The Finished Barrel
I Finally finished the texture for the wooden barrel I've been working on, making this my first real model I've finsihed with Maya. Heres a few renders of the finished barrel:
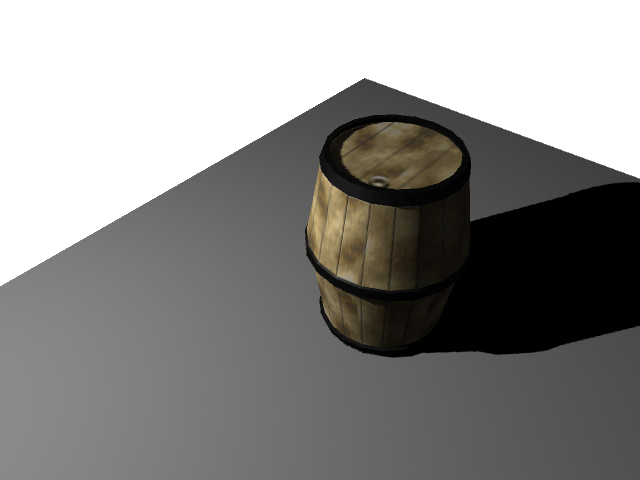
In the render above I couldn't figure out how to change the density of the shadows, so I may come back to that once I find out how and re-render it. Heres another render without any lights:
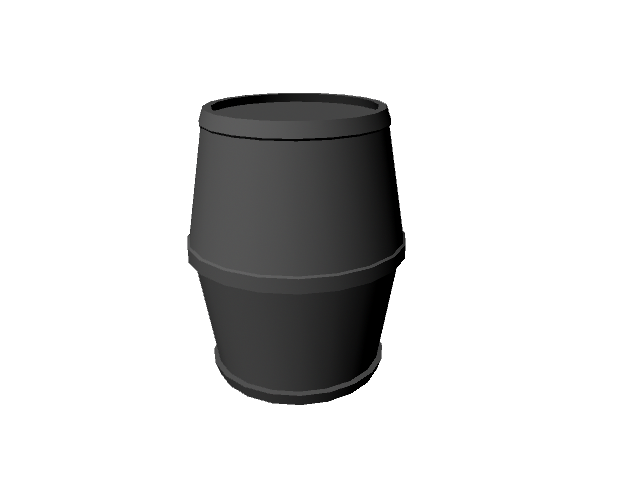
Heres a render of the barrel model without its texture applied and the finished texture file:
In the render above I couldn't figure out how to change the density of the shadows, so I may come back to that once I find out how and re-render it. Heres another render without any lights:
Heres a render of the barrel model without its texture applied and the finished texture file:
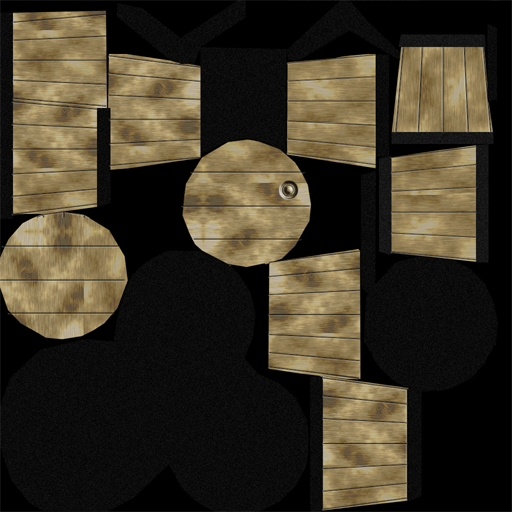
Finally, here is the finished texture file:
Now that the barrel is completed, I'm going to move on to learning a few of Maya's advanced features and hopefully get to grips with the animation side of it a little more. :-)
The Finished Barrel
I Finally finished the texture for the wooden barrel I've been working on, making this my first real model I've finsihed with Maya. Heres a few renders of the finished barrel:
In the render above I couldn't figure out how to change the density of the shadows, so I may come back to that once I find out how and re-render it. Heres another render without any lights:
Heres a render of the barrel model without its texture applied and the finished texture file:
In the render above I couldn't figure out how to change the density of the shadows, so I may come back to that once I find out how and re-render it. Heres another render without any lights:
Heres a render of the barrel model without its texture applied and the finished texture file:
Finally, here is the finished texture file:
Now that the barrel is completed, I'm going to move on to learning a few of Maya's advanced features and hopefully get to grips with the animation side of it a little more. :-)
Saturday, 16 October 2010
The Barrel
I've got to the point with Maya now where I can create and UV map slightly more complicated objects thanks to Autodesk's tutorial handbook and what I've learnt so far from lectures in university. I've been working on a wooden barrel model which so far, is comming along nicely. The model itself is pretty much finished, but the texture is taking a while to create, since it has to fit the UV template of the barrel that was rendered in Maya and saved for use in photoshop as a reference.
Here is a render of how the texture looks so far when applied to the wooden barrel model:
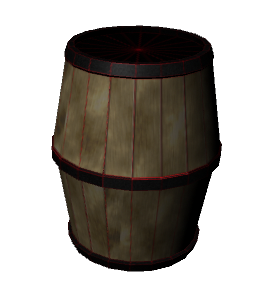 You can see that the top or cap of the barrel is unfinished, along with the horrible red template lines I've left overlayed onto the texture as a reference temporary. The back and bottom of the barrel, which are not visible in the render also have no texture, except for the UV template outlines. When the barrel texture is finished, It'll have a cap on the top, grooves in the wood to distinguish each of the planks that make up the barrel and maybe some scratches and markings on it so it looks a little more used or worn. You won't see any of the red lines either, obviously. :-)
 |
| UV template for the barrel - rendered by the UV Texture Editor in Maya |
The Barrel
I've got to the point with Maya now where I can create and UV map slightly more complicated objects thanks to Autodesk's tutorial handbook and what I've learnt so far from lectures in university. I've been working on a wooden barrel model which so far, is comming along nicely. The model itself is pretty much finished, but the texture is taking a while to create, since it has to fit the UV template of the barrel that was rendered in Maya and saved for use in photoshop as a reference.
Here is a render of how the texture looks so far when applied to the wooden barrel model:
You can see that the top or cap of the barrel is unfinished, along with the horrible red template lines I've left overlayed onto the texture as a reference temporary. The back and bottom of the barrel, which are not visible in the render also have no texture, except for the UV template outlines. When the barrel texture is finished, It'll have a cap on the top, grooves in the wood to distinguish each of the planks that make up the barrel and maybe some scratches and markings on it so it looks a little more used or worn. You won't see any of the red lines either, obviously. :-)
|
| UV template for the barrel - rendered by the UV Texture Editor in Maya |
Thursday, 7 October 2010
Starting out with Maya
Over the last few days I've been doing the built-in tutorials of Maya to get to grips with the interface and a few of the basic tools needed to create things. By the end of the last tutorial I had a textured ball with a simple bounce animation, lit up by a spot light. Heres a screenshot of it:

This is required as part of a course I've been doing at university for over a year now which teaches you in the way of how the games industry works, the tools they use to create games and most importantly, how to put your creativity to use by way creating media assets that can be used in a game, or the design process of a game.
I'm hoping to become a computer games programmer once I've finished the course (maybe even before, who knows), but at the same time, gain an understanding of how each of the other stages in creating a game are generally performed. For example, the concept art and design, audio creation, 3D modelling, animation, narrative, testing and more.
Starting out with Maya
Over the last few days I've been doing the built-in tutorials of Maya to get to grips with the interface and a few of the basic tools needed to create things. By the end of the last tutorial I had a textured ball with a simple bounce animation, lit up by a spot light. Heres a screenshot of it:
This is required as part of a course I've been doing at university for over a year now which teaches you in the way of how the games industry works, the tools they use to create games and most importantly, how to put your creativity to use by way creating media assets that can be used in a game, or the design process of a game.
I'm hoping to become a computer games programmer once I've finished the course (maybe even before, who knows), but at the same time, gain an understanding of how each of the other stages in creating a game are generally performed. For example, the concept art and design, audio creation, 3D modelling, animation, narrative, testing and more.
Subscribe to:
Comments (Atom)